Creating and Managing Calendars
My Calendars
Creating & Managing Calendars
Organise awareness days into named, colour-coded calendars. Save events for different campaigns, teams, or themes and access them from any device.
How calendars work
Awareness Planner uses a calendar system that lets you organise saved events into separate, named lists. Think of each calendar as a folder for a specific purpose — you might have one for your social media team, another for a health campaign, and a third for school events.
Key concepts:
- Every account starts with a default calendar called “My Favourites”
- You can create additional calendars with custom names and colours
- Events can belong to multiple calendars at once
- Each calendar can be exported independently
Saving events
There are several ways to save an event:
Quick save (star icon)
Click the star icon on any event card, list row, or calendar cell. This adds the event to your currently active calendar. A filled star indicates the event is already saved to at least one calendar.
From the event detail modal
Open any event and click “Save to Calendar” to add it to your active list. Use the list picker dropdown to choose a specific calendar or add to multiple calendars at once.
From the calendar view
In calendar view, click a date to see that day’s events in a popup, then star any event directly from the popup.
Creating calendars
To create a new calendar:
- Open the calendars panel by clicking “My Calendars” in the header.
- Click the “+” button at the top of the panel, next to the calendar tabs.
- Enter a name for your calendar — for example, “Q2 Social Media” or “Health Campaign 2026”.
- Your new calendar is ready. It’s automatically assigned a colour from the palette and becomes your active calendar.
You can create as many calendars as your plan allows. The colour is automatically assigned from a rotating palette of 10 colours.
Managing your lists
Renaming a calendar
In the calendars panel, click the calendar name to edit it inline. Type your new name and press Enter or click away to save.
Deleting a calendar
Click the delete icon next to any calendar to remove it. You’ll be asked to confirm. The default “My Favourites” calendar cannot be deleted.
Removing individual events
To remove an event from a calendar, open the calendars panel, find the event in the list, and click the remove icon. Alternatively, click the filled star on an event to remove it from the active calendar.
Clearing a calendar
To remove all events from a calendar at once, use the “Clear all” option in the calendar panel. You’ll be asked to confirm before events are removed.
Adding events to multiple calendars
A single event can appear in as many calendars as you like. This is useful when an event is relevant to multiple campaigns or teams.
To add an event to multiple calendars:
- Open the event detail modal by clicking the event.
- Click the list picker dropdown next to the save button.
- Check the calendars you want to add the event to. You can also create a new calendar from this dropdown.
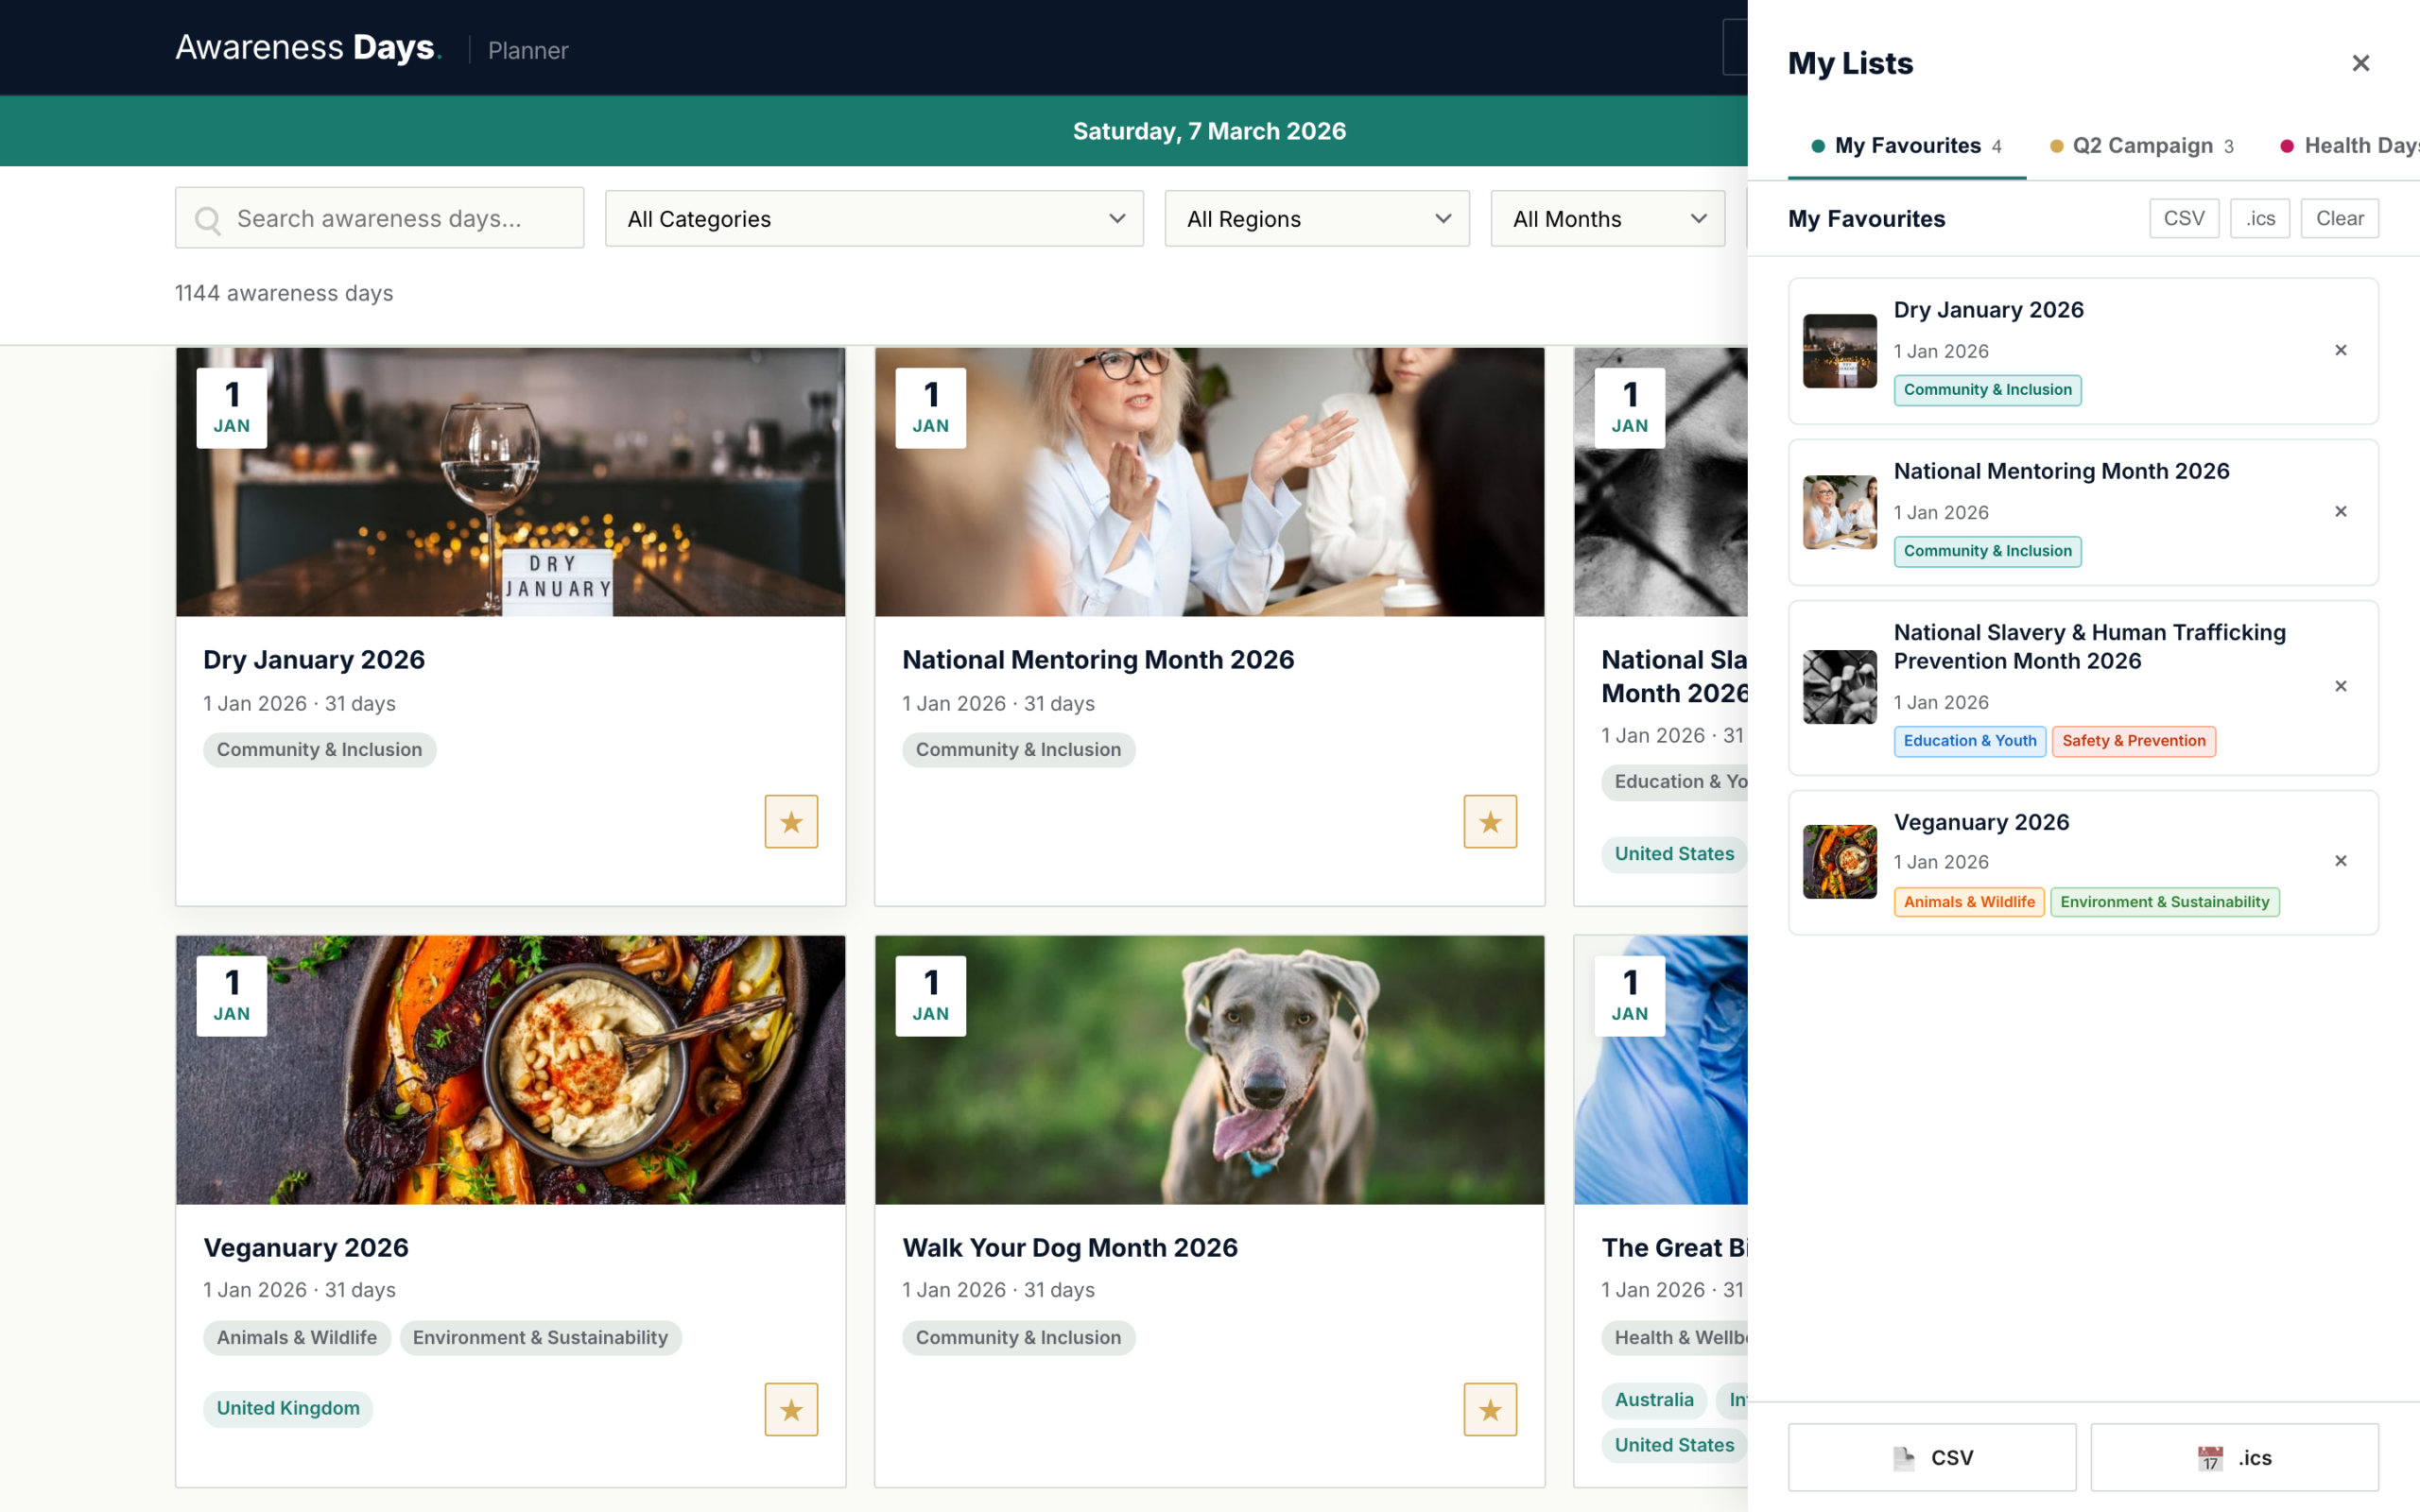
The calendars panel
Click “My Calendars” in the header to open the side panel. This shows:
- Calendar tabs — switch between your calendars along the top
- Event count — how many events are in the active calendar
- Event list — a scrollable list of all saved events, ordered by date
- Actions — export, clear, and manage options for the active calendar
Each event in the list shows its date, title, and category badge. Click any event to open its detail modal.
Cloud sync
If you’re logged in, your calendars sync automatically to your account. Changes are saved within 2 seconds of any action — adding an event, creating a calendar, or renaming a list.
This means you can:
- Start on your laptop and continue on your phone
- Share a login with a colleague to collaborate on the same calendars
- Never lose your saved events if you clear your browser data
Plan limits
| Feature | Free | Planner | Planner Pro |
|---|---|---|---|
| Saved events | 10 total | 25 items | Unlimited |
| Calendars (lists) | 1 | 3 | Unlimited |
| Cloud sync | ✓ | ✓ | ✓ |
When you reach your plan’s limit, you’ll see a prompt to upgrade. Your existing events are preserved — you just can’t add more until you upgrade or remove some.